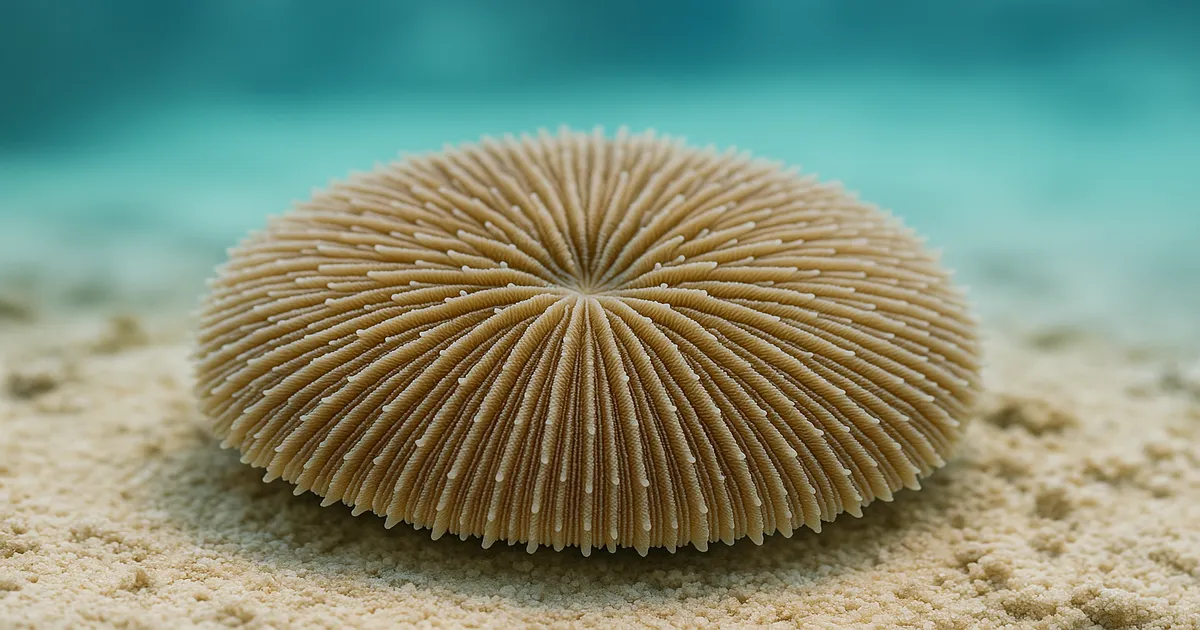
Quick Answer: “Cutting back” plate coral means one of two things — intentionally fragging it to create new colonies, or trimming necrotic tissue to save a stressed coral. Both require clean tools, precise cuts, and stable water quality before and after. Plate corals (Fungia, Heliofungia, Cycloseris, and related genera) are single-polyp LPS corals, so handling them correctly is critical to survival.
Knowing how to cut back plate coral properly can mean the difference between a thriving frag and a lost coral. Whether you’re propagating a healthy specimen or racing to stop tissue recession, the techniques differ — and mixing them up is one of the most common mistakes hobbyists make. This guide covers both scenarios in full, along with everything you need to know about keeping plate corals healthy before and after the knife comes out.
How to Cut Back Plate Coral: What the Phrase Actually Means
The phrase gets used two ways in the hobby. The first is fragging — deliberately cutting a healthy plate coral into pieces so each fragment grows into a new coral. The second is tissue management — removing dying, necrotic, or infected tissue with a scalpel or bone cutters before it spreads and kills the whole animal.
Both are legitimate techniques with different goals, different timing, and different aftercare. Confusing them — for instance, trying to frag a coral that’s actually in the early stages of tissue necrosis — usually ends badly.
- Fragging: Performed on a healthy, well-fed coral to propagate new specimens. Each piece containing tissue and skeleton can regenerate into a full coral.
- Tissue trimming: An emergency procedure performed when recession, brown jelly disease, or RTN threatens the coral. You’re cutting ahead of the damage to save what’s left.
Understanding Plate Coral Biology Before You Cut
Species Overview
Plate corals belong to the family Fungiidae. Several genera appear regularly in reef tanks:
- Fungia spp. — the classic round plate coral; most common in the hobby
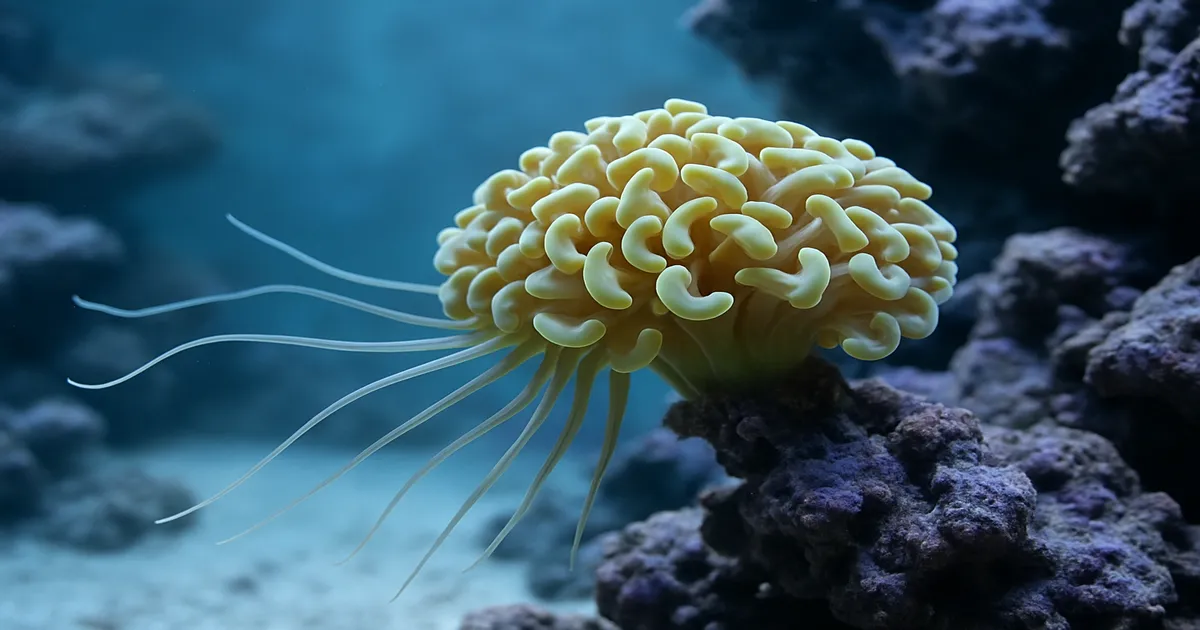
- Heliofungia actiniformis — the long-tentacle plate coral, often mistaken for an anemone
- Cycloseris spp. — smaller, often more colorful disc corals
- Polyphyllia and Herpolitha spp. — elongated slipper or tongue-shaped plate corals
- Lithophyllon spp. — recently reclassified from Fungia; similar care requirements
Every disc is a single, large polyp. There’s no colony structure and no secondary polyps to fall back on. Every cut affects the entire animal.
Why Plate Corals Are Unique Among LPS Corals
Unlike most stony corals, adult plate corals are free-living — they rest on the sandbed rather than attaching to rock. Juveniles briefly cement to hard substrate, then detach as they grow. In the wild, they inhabit sandy lagoon floors and reef rubble zones across the Indo-Pacific, and they can even right themselves if overturned.
This free-living nature matters when cutting. There’s no base to anchor the coral during the process, and the entire underside of the disc is living tissue that can be damaged by rough handling or abrasive surfaces.
How Structure Affects Your Cutting Approach
A plate coral is essentially a dense calcium carbonate skeleton covered by a thin but continuous tissue layer, with a central oral disc and mouth. Cuts must pass cleanly through both skeleton and tissue. A ragged or partial cut tears tissue unnecessarily and dramatically increases infection risk. Healing is also slower than with branching corals — expect weeks, not days.
How to Frag Plate Coral for Propagation
Tools You Will Need
- Coral bone cutters or a Dremel with a diamond blade
- A sharp scalpel or razor blade
- Clean container filled with tank water
- Iodine-based coral dip (Lugol’s solution) or a commercial dip such as Coral Rx
- Frag plugs or clean rubble pieces
- Gel cyanoacrylate (super glue) for mounting
- Nitrile gloves
- Sterilised tools (rinse in isopropyl alcohol, then rinse with RODI water before use)
Step-by-Step Fragging Process
- Fast the coral for 1–2 days before fragging. An empty digestive system reduces waste at the wound site.
- Remove the coral from the display tank and place it in a clean container of tank water.
- Plan your cuts. Each fragment needs a portion of the oral disc or at least a significant piece of tissue-covered skeleton. Aim for pieces no smaller than 1–2 inches across — smaller fragments rarely survive.
- Make firm, decisive cuts through the skeleton using bone cutters or a Dremel. Hesitant, partial cuts cause more tissue damage than a single clean pass.
- Trim ragged tissue edges with a scalpel, cutting back to clean, intact tissue.
- Dip all fragments in diluted Lugol’s iodine solution (10 drops per liter of tank water) for 5–10 minutes, or follow the dosing instructions for your chosen commercial dip.
Mounting and Healing Frag Pieces
Place fragments tissue-side up on frag plugs or rubble pieces. A small dot of gel super glue on the skeleton — not the tissue — can hold them in position. Move frags to a dedicated frag tank or quarantine system with stable parameters, gentle indirect flow, and moderate lighting (50–100 PAR to start).
Tissue will likely recede slightly at cut edges during the first week or two. This is normal. Expect 2–6 weeks for tissue to stabilise and begin extending over exposed skeleton. Do not feed for the first 1–2 weeks post-cut. Open wounds and decaying food are a fast track to bacterial infection and brown jelly disease.
How to Trim Necrotic or Receding Plate Coral Tissue
Identifying Tissue Recession and Necrosis
Watch for these warning signs:
- White skeleton becoming visible where tissue has pulled back
- Brown, gelatinous slime on the tissue surface (brown jelly disease)
- A distinct, advancing recession line separating healthy tissue from bare skeleton
- Foul odor coming from the coral
RTN (Rapid Tissue Necrosis) moves fast — the white line can cross the entire disc in 24–48 hours. STN (Slow Tissue Necrosis) progresses over days or weeks. Brown jelly disease is a secondary protozoan infection (often Helicostoma spp.) that frequently accompanies tissue damage and can be equally devastating.
When to Cut vs. When to Dip and Wait
If the recession line is small and slow-moving, a coral dip alone may halt it. But if the line is advancing quickly, if brown jelly is present, or if more than 20–30% of the disc is already exposed, cut ahead of the recession line immediately. Waiting costs you healthy tissue.
Step-by-Step Tissue Trimming Technique
- Remove the coral from the display tank at once. Don’t let brown jelly or necrotic tissue contaminate your main system.
- Blow off brown jelly gently with a turkey baster into a separate waste container.
- Identify the recession line. Cut into healthy tissue, 3–5 mm beyond the necrotic boundary. Cutting right at the line leaves compromised tissue behind.
- Make a clean cut through healthy tissue and skeleton using bone cutters or a scalpel.
- Dip the coral immediately in Lugol’s iodine solution (10 drops per liter) or a commercial coral dip for 5–10 minutes.
- Place in a quarantine tank — not back in the display. Ammonia and nitrite must be absolute zero, and flow should be gentle.
Check the coral twice daily for the first week. Any return of brown jelly or continued recession means another dip is needed.
Water Parameters for Plate Coral Health and Recovery
Ideal Parameter Ranges
| Parameter | Target Range |
|---|---|
| pH | 8.1–8.3 |
| Salinity (SG) | 1.025–1.026 |
| Temperature | 76–79°F (24–26°C) |
| Alkalinity (dKH) | 8–10 |
| Calcium | 400–425 ppm |
| Magnesium | 1,250–1,350 ppm |
| Ammonia | 0 ppm |
| Nitrite | 0 ppm |
| Nitrate | 1–10 ppm |
| Phosphate | 0.02–0.05 ppm |
Why Stability Matters More Than Perfect Numbers
After fragging, new skeletal growth at wound edges requires consistent calcium and alkalinity. A dKH that swings from 7 to 11 in a week stresses the coral far more than a stable 9 ever would. Magnesium is the silent partner — keep it at 1,250–1,350 ppm to prevent calcium and alkalinity from precipitating out of solution.
Plate corals tolerate slightly elevated nutrients better than SPS corals. A nitrate of 5–8 ppm is fine and can actually support recovery. What they cannot handle is instability. Test parameters every 2–3 days during the healing period and make only small, gradual corrections. A reliable liquid test kit such as the Salifert Calcium and Alkalinity Test Kits will give you far more accurate readings than test strips during this critical window.
Tank Setup for Plate Coral
Tank Size and Substrate
A 30-gallon tank is the absolute minimum for a single plate coral, but 50+ gallons is strongly recommended. Larger volumes buffer parameter swings more effectively.
Substrate should be 2–4 inches of fine aragonite reef sand. Plate corals are meant to rest on a soft sandbed — placing them on bare rock or coarse substrate causes tissue abrasion on the underside, which is a direct path to necrosis. Crushed coral is a particular hazard and should be avoided entirely. A quality aragonite sand such as CaribSea Arag-Alive provides the right texture and buffers pH naturally.
Lighting and Flow
Most plate coral species do well at 50–150 PAR with a 10–12 hour photoperiod. Heliofungia tends to prefer the lower end of that range. Avoid SPS-level lighting (250+ PAR) without a very gradual acclimation period — sudden high light is one of the most common causes of bleaching in newly acquired plate corals.
For flow, target 10–20x tank volume turnover per hour, but never blast the coral directly with a powerhead. Randomised, indirect flow from a quality wavemaker such as the Jebao SLW-10 mimics natural surge far better than laminar flow. Too little flow is just as dangerous as too much — detritus accumulating under the disc creates anaerobic dead zones that trigger necrosis from the bottom up.
Feeding Plate Coral Before and After Cutting
Zooxanthellae provide 70–90% of a plate coral’s energy through photosynthesis, but these corals are also active predators. In the wild, they capture zooplankton, copepods, and small crustaceans. In captivity, they’ll readily take frozen mysis shrimp, enriched brine shrimp, small krill pieces, and Cyclops. A dedicated coral food such as Polyplab Reef-Roids works well for target feeding and is easy to deliver directly onto the oral disc with a turkey baster.
Feeding schedule: Under normal conditions, feed 2–3 times per week. Reduce or pause flow 15–30 minutes before feeding, deliver food directly onto the oral disc, and remove uneaten food after 30–60 minutes.
After fragging or trimming: Pause feeding entirely for 1–2 weeks. Once tissue edges have visibly stabilised, resume with one small feeding per week before returning to your regular schedule.
Common Problems After Cutting Back Plate Coral
Brown Jelly Disease
The most urgent post-cut threat. Brown jelly disease can consume an entire plate coral within 24–48 hours. Act immediately: remove the coral, blow off the jelly with a turkey baster, dip in Lugol’s iodine solution (10 drops per liter for 5–10 minutes), and move to a clean quarantine tank. Repeat dips every 24–48 hours until the tissue stabilises. Do not return the coral to the display tank until it has fully recovered.
RTN and STN
RTN moves in hours; STN in days to weeks. Both present as white skeleton becoming exposed as tissue peels away. If caught early, a coral dip and immediate water quality improvement may be enough. If it’s advancing fast, cut ahead of the recession line — into healthy tissue beyond the necrotic boundary — then dip and quarantine. Antibiotic baths (ciprofloxacin) are sometimes used in severe cases, but they disrupt biological filtration and should be a last resort.
Bleaching
A bleached plate coral has lost its zooxanthellae, usually from temperature stress, excessive lighting, or a sudden salinity swing. Identify and correct the stressor first. Then reduce lighting temporarily, keep parameters stable, and increase feeding frequency to supplement lost photosynthetic nutrition. Plate corals can make a full recovery from bleaching if the cause is addressed quickly.
Bristle Worm Damage
Injured plate corals attract predatory bristle worms at night. If healing a fragged or trimmed coral in a display tank, inspect the sandbed after lights-out with a red light. Large bristle worms (over 3–4 inches) should be removed with a bristle worm trap such as the Coral Rx Bristle Worm Trap or manually with long tweezers. Moving recovering corals to a quarantine tank sidesteps this problem entirely.
Frequently Asked Questions About How to Cut Back Plate Coral
Can you frag a plate coral without killing it?
Yes. Fragging is a well-established propagation method, and the parent coral typically survives if it’s healthy going in and aftercare is solid. The key is making clean cuts, dipping all pieces, and maintaining excellent water quality during recovery. A stressed or already-declining coral should not be fragged — address the underlying problem first.
How small can a plate coral frag be and still survive?
Aim for fragments no smaller than 1–2 inches across, with visible tissue covering a portion of the skeleton. Smaller pieces lack the tissue mass to sustain themselves through the healing process and almost always fail. If the oral disc is present in a fragment, survival odds improve significantly.
How long does it take a plate coral to heal after cutting?
Expect 2–6 weeks for tissue to stabilise at cut edges and begin extending over exposed skeleton. Full skeletal regrowth takes much longer — several months to a year depending on the size of the fragment and water quality. Don’t rush the process by increasing light or feeding too soon.
Should I cut back plate coral tissue or just dip it?
It depends on how fast the recession is moving. A slow, small recession line may respond to dipping alone. If more than 20–30% of the disc is exposed, the recession line is advancing visibly, or brown jelly is present, cut ahead of the damage immediately. Dipping without cutting rarely stops fast-moving necrosis.
What’s the biggest mistake people make when cutting back plate coral?
Waiting too long. Whether you’re dealing with tissue necrosis or brown jelly disease, hesitation costs healthy tissue. The second most common mistake is putting the coral straight back into the display tank after cutting — always quarantine until the wound edges have fully stabilised.